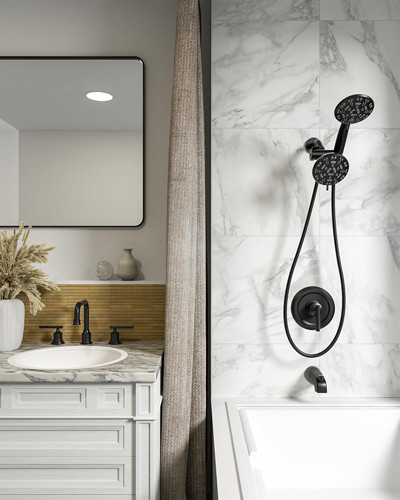
Creating a walk-in shower is a fantastic way to enhance the aesthetics and functionality of your bathroom. A well-constructed shower base is essential for ensuring proper drainage, preventing leaks, and providing a solid foundation for your shower floor. Whether you’re a DIY enthusiast or a novice, this guide will walk you through the process of building a shower base that suits your needs.
How to Build a Shower Base for a Walk-In Shower
Step 1: Gather Your Materials and Tools
Before starting your project, ensure you have all the necessary materials and tools. Here’s a list of what you’ll need:
Materials:
- Shower pan or mortar mix
- Water-resistant drywall or cement board
- PVC or ABS drain assembly
- Waterproof membrane (if not using a pre-fabricated shower pan)
- Thin-set mortar
- Tile (if desired for the floor)
- Grout
- Silicone sealant
Tools:
- Tape measure
- Level
- Trowel
- Utility knife
- Screwdriver
- Hammer
- Saw (for cutting boards)
- Drill
- Bucket (for mixing mortar)
Step 2: Plan Your Layout
Before you begin construction, it’s crucial to plan the layout of your walk-in shower. Consider the following:
- Size: Determine the size of your shower based on the available space and your personal preferences. A typical walk-in shower can range from 36 inches by 36 inches to 48 inches by 60 inches or larger.
- Drain Location: Choose the best location for your drain. It should be centrally located or positioned in a way that allows for efficient water drainage. The floor should slope towards the drain to prevent standing water.
- Walls: Decide how you’ll frame the walls around your shower base. Ensure that the height of your walls accommodates the desired showerhead height.
Step 3: Prepare the Subfloor
The next step involves preparing the subfloor for your shower base. Here’s how to do it:
- Remove Existing Flooring: If you’re renovating an existing bathroom, carefully remove any existing flooring materials.
- Check for Level: Use a level to ensure that your subfloor is even. If necessary, make adjustments using shims or leveling compounds.
- Install the Drain: Position the drain assembly in the desired location. Follow the manufacturer’s instructions for proper installation. Ensure that the drain is securely connected to the plumbing beneath the subfloor.
Step 4: Build the Shower Base
Once the subfloor is prepared and the drain is installed, you can begin constructing the shower base.
Option 1: Using a Pre-Fabricated Shower Pan
- Choose a Shower Pan: Select a pre-fabricated shower pan that fits your desired dimensions. Ensure it’s compatible with your drain.
- Install the Pan: Follow the manufacturer’s instructions for installation. Typically, you’ll need to apply thin-set mortar to the subfloor, place the pan on top, and secure it in place.
- Check for Level: Use a level to ensure that the shower pan is even and slopes towards the drain.
Option 2: Building a Mortar Bed
- Create a Sloped Bed: If you prefer to build a mortar bed, start by constructing a perimeter using 2x4s to contain the mortar.
- Mix the Mortar: Follow the instructions on your mortar mix to achieve the right consistency. It should be workable but firm enough to hold its shape.
- Shape the Mortar: Pour the mixed mortar into the contained area, sloping it towards the drain. Aim for a gradient of about 1/4 inch per foot towards the drain to facilitate proper drainage.
- Smooth the Surface: Use a trowel to smooth the surface of the mortar, ensuring it’s even and properly sloped.
- Let it Cure: Allow the mortar to cure for at least 24 hours before proceeding.
Step 5: Install the Waterproof Membrane
Regardless of whether you used a pre-fabricated pan or built a mortar bed, applying a waterproof membrane is essential to prevent leaks.
- Cut the Membrane: Measure and cut the waterproof membrane to fit your shower base. Ensure it extends up the walls by at least a few inches.
- Apply the Membrane: Adhere the membrane to the base and walls using thin-set mortar or the adhesive recommended by the manufacturer. Be sure to cover the drain area properly.
- Seal the Edges: Use silicone sealant to ensure that the edges of the membrane are securely sealed against the wall.
Step 6: Tile the Shower Base (Optional)
If you’re tiling your shower base, this is the time to do it.
- Prepare the Tile: Cut your tiles to fit the shower base, making sure to leave space for grout.
- Apply Thin-Set Mortar: Spread a layer of thin-set mortar on the shower base using a trowel. Press the tiles into the mortar, ensuring they are level and properly aligned.
- Grout the Joints: After the thin-set has cured (usually 24 hours), fill the joints between the tiles with grout. Use a grout float to apply it evenly and clean off any excess.
Step 7: Finish the Walls
With the shower base completed, it’s time to finish the walls of your walk-in shower.
- Install Wall Panels: Use water-resistant drywall or cement board to cover the shower walls. Cut the panels to fit and secure them in place with screws.
- Seal the Joints: Use a waterproof sealant at the joints where the wall meets the shower base to prevent leaks.
- Tile the Walls: If desired, tile the shower walls following similar steps as the base, using thin-set mortar and grout.
Step 8: Final Touches
Finally, add the finishing touches to your walk-in shower.
- Install Fixtures: Attach your showerhead, faucet, and any other fixtures according to the manufacturer’s instructions.
- Seal All Edges: Use silicone sealant around the edges of the shower base, fixtures, and any seams to prevent water infiltration.
- Test for Leaks: Before using your shower, turn on the water and check for any leaks. Address any issues immediately.
Conclusion
Building a shower base for a walk-in shower is a rewarding DIY project that can enhance your bathroom’s functionality and style. By following these steps and paying attention to detail, you can create a durable and beautiful shower base that meets your needs. Whether you choose to use a pre-fabricated pan or build a mortar bed, proper planning and execution will ensure your walk-in shower is a successful addition to your home. Happy building!
 WOWOW Faucets


您好!Please sign in