What Is A 4 Hole Kitchen Faucet – How to Install It

Before purchasing a kitchen faucet, you need to figure out how many mounting holes near the sink, which can have from one to four. Four-hole faucets are popular because they have greater versatility than other options. So what’s a 4 hole kitchen faucet and how to install it? Read this post and you can get a satisfying answer.
What is a 4 hole kitchen faucet
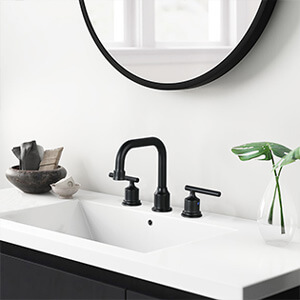
Actually, a 4-hole-sink faucet is like a 3-hole faucet that is installed in the middle hole, and the two handles are installed on the outer holes. As the fourth mounting hole, it may have a spray/stream selector, which allows users to switch between modes. Pullout spouts are a useful combination of spray and spout functions. Side sprayers are another common addition.
How to install a 4 hole kitchen faucet
Before installl a 4 hole kitchen faucet, you need to prepare the following tools in advance:
- Utility knife to cut tape and others
- Basin wrench or pliers
- Two adjustable wrenches
- Putty knife
- Flashlight
- Eyewear or glasses as dust-protection
- Towel or soft cloth or sponge and water bucket
- The kitchen faucet that you want to install
- Both hot and cold water supply lines
- Baking soda or any cleanser
- Scrub brush or old toothbrush
- Plumber’s putty
Then you can start to follow the guide below to install a 4 hole kitchen faucet.
Step 1: Turn off the water supply
Use the shut-off valve under the sink or, if your setup lacks these, use the main water shut-off valve of the house to shut off the water. To prevent water leakage during installation, please open the handle of the faucet to let the remaining water flow out.
Step 2: Prepare the mounting holes
If it has not been assembled, screw the flange to the bottom of the handle and tighten it until it reaches the top of the handle. Wrap some plumber’s putty on the underside of the flange, and then insert the handle and flange assembly into the mounting hole from above. Under the sink, screw the lock nut and washer (if your component has) to the bottom of the handle, and then tighten it with a wrench until it is secure. Remove excess putty after tightening.
Step 3: Assemble the spray hose and sprayer nozzle
If it is not already assembled, screw the sprayer nozzle to the larger end of the spray hose. Try not to overtighten it (this will cause pressure when using the sprayer).
Step 4: Screw the spray hose into the mounting hole
Screw the smaller end of the spray hose into the handle and flange from above. Pass the hose all the way through and keep the sprayer nozzle in its holder.
Step 5: Connect the spray hose to the water separator
Under the sink, use pliers to loosen and remove the lid on the trap (if you have one). Put the lid in a safe place in case you decide to unload the sink sprayer in the future. Screw the hex nut end of the hose onto the manifold. Some diverter and water supply hose settings allow you to simply press the hose on the diverter to connect it. Gently pull the hose to confirm that it is properly connected.
Step 6: Turn on the water supply again and test
Run your faucet to make sure it is working properly. Remove the sink sprayer from the base and spray it into the sink basin at different pressures for testing. Make sure there are no leaks under the sink.
 WOWOW Faucets
您好!Please sign in