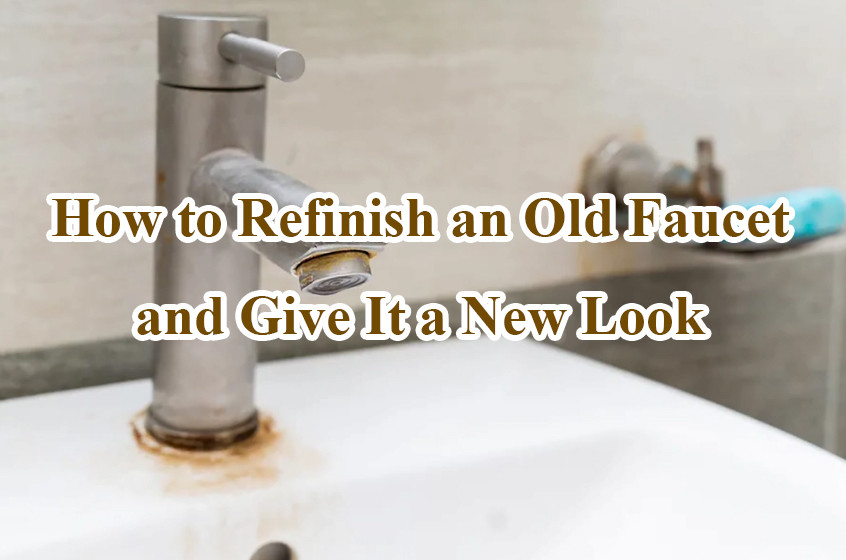
If you’ve noticed that your faucet is looking a little worn out, you don’t have to rush to buy a new one. Refinishing your old faucet can be a great way to restore its appearance without the hefty cost of replacement. With a little effort and the right materials, you can give your faucet a fresh, new look. This guide will walk you through the process of refinishing an old faucet to bring it back to life.
Why Refinish an Old Faucet?
There are several reasons why refinishing a faucet is a good idea. First, it saves money. Faucets, especially high-quality ones, can be quite expensive, and refinishing allows you to get the same fresh look without purchasing a replacement. Second, it’s environmentally friendly. By refinishing your faucet, you’re extending its lifespan and reducing waste. Third, it offers a chance to update the style of your kitchen or bathroom without a complete overhaul.
Refinishing a faucet can be done with a variety of methods, depending on the material and finish of the faucet, as well as the look you’re aiming for. Whether you want to restore its original shine or change its finish completely, the process can be relatively simple.
Tools and Materials You’ll Need
Before you start, gather the following tools and materials:
- Cleaning supplies: A non-abrasive cleaner, soft cloth, and a toothbrush or small scrubbing brush.
- Rust remover: For faucets with rust spots, this will help remove stubborn marks.
- Screwdriver: To remove the faucet handles and other components.
- Painter’s tape: To mask off areas you don’t want to paint or refinish.
- Spray primer: A bonding primer suitable for metal surfaces.
- Spray paint or faucet refinishing kit: Choose a spray paint specifically designed for metal surfaces or use a refinishing kit that includes both primer and paint for faucets.
- Clear coat finish: This will provide a protective layer and ensure the paint job lasts.
- Sandpaper or steel wool: For lightly sanding the faucet surface before refinishing.
- Drop cloths or newspapers: To protect surrounding surfaces from overspray.
Step-by-Step Guide to Refinishing Your Faucet
1. Remove the Faucet
The first step is to remove the faucet from the sink. To do this, use your screwdriver to detach the faucet handles and base. Be careful not to damage any screws or washers, as you may need to reattach them later. Once the faucet is detached, take it to a work surface where you can easily access it.
2. Clean the Faucet Thoroughly
Before you begin refinishing, it’s essential to clean the faucet thoroughly. Use a non-abrasive cleaner and a soft cloth to wipe down all surfaces. Be sure to scrub hard-to-reach areas, such as around the base and spout, with a toothbrush. If you notice any rust, apply a rust remover and let it sit for the recommended amount of time before scrubbing the affected area.
Once cleaned, rinse the faucet with water and dry it completely with a soft towel. Any water left on the faucet could interfere with the refinishing process.
3. Prepare the Surface
To ensure the new finish adheres properly, lightly sand the faucet’s surface. Use fine-grit sandpaper or steel wool to remove any peeling paint, oxidation, or rough spots. This step is especially important for metal faucets that may have developed a worn or pitted surface over time. Sanding will create a smooth surface for the new paint or finish to bond with.
After sanding, wipe the faucet down with a clean, dry cloth to remove any dust and debris.
4. Mask Off Areas You Don’t Want to Paint
If your faucet has any delicate parts or areas you don’t want to refinish (such as the water handles or connection points), use painter’s tape to mask them off. Make sure to apply the tape securely to prevent paint from getting on the areas you want to leave untouched. You may also want to cover the sink and surrounding areas with newspapers or a drop cloth to protect them from overspray.
5. Apply Primer
Now it’s time to apply primer. Choose a bonding primer that is suitable for metal surfaces. Lightly spray an even coat over the entire faucet, ensuring that every exposed area gets a thin layer. Hold the can about 8-12 inches away from the surface to avoid drips. If necessary, apply a second coat after the first has dried completely.
Priming is essential because it helps the paint adhere better to the surface and provides a uniform base for the finish. Let the primer dry for at least an hour or as recommended on the product instructions.
6. Paint the Faucet
Once the primer is dry, it’s time to paint your faucet. Choose a high-quality spray paint designed for use on metal surfaces. Matte black, brushed nickel, or polished chrome are popular options, but there are many colors and finishes available to suit your preferences.
Spray the faucet with even, light coats, allowing each layer to dry before applying the next. You may need to apply two or three coats to achieve the desired coverage. Be patient and avoid applying too much paint at once, as this can lead to drips or an uneven finish.
Make sure the faucet is fully dry before moving to the next step, usually about 24 hours.
7. Apply a Clear Coat Finish
To protect the new finish and enhance its durability, apply a clear coat finish. This will provide a layer of protection against water, rust, and daily wear and tear. Just like with the primer and paint, apply the clear coat in light, even coats, and allow it to dry completely between layers.
A clear coat will also give the faucet a shiny, polished look that mimics the appearance of a brand-new fixture.
8. Reassemble and Reinstall the Faucet
Once your refinished faucet has fully dried and the clear coat is set, carefully remove the painter’s tape. Reassemble the faucet by attaching the handles and connecting it back to the sink. Ensure that all parts are securely tightened and that there are no leaks before using the faucet again.
Tips for Success
- Be patient: Refinishing a faucet is a multi-step process that requires patience. Allow each coat of primer, paint, and clear finish to dry completely before moving on to the next step.
- Choose the right finish: Make sure the finish you choose complements the style of your kitchen or bathroom. Matte finishes work well in modern spaces, while polished finishes may suit traditional or vintage-style interiors.
- Use a high-quality paint: Invest in high-quality, durable paint designed for metal surfaces. This ensures your faucet will not only look great but will last longer without chipping or fading.
Conclusion
Refinishing an old faucet is an affordable and eco-friendly way to give your bathroom or kitchen a fresh look. By following these simple steps, you can restore your faucet’s appearance and enjoy a brand-new look without the cost of a replacement. Whether you’re updating your home’s style or just giving your faucet a second life, refinishing is a rewarding DIY project that will leave you with impressive results.
 WOWOW Faucets


您好!Please sign in