How To Install A Pot Filler In An Existing Wall
If you frequently have to haul a lot of water back and forth from the kitchen sink to the cooktop, a pot filler might be just what you need. These handy fixtures take the hassle out of you. Installing pot fillers isn’t tricky, but several factors can complicate the process. Whether you’re doing a kitchen remodel, building a new home from scratch, or using existing walls, installing pot fillers is feasible.
Is It Difficult To Install A Pot Filler In An Existing Wall?
Installing pot fillers on existing walls can be tricky in some cases. When completely renovating a kitchen or building a new one from scratch, the process is much simpler. For example, the process can be complicated if the wall behind the stove consists of a hard surface that requires special tools to drill through.
You’ll need to introduce water pipes on the inside of the wall behind the stove, which can be complicated, especially if you’re new to DIY projects like this. Many times, there is no water supply line near where you need a new one.This means you need to tap into the nearest existing line, which could be the line of your kitchen faucet, refrigerator ice maker or dishwasher. The new water line needs to be hooked into the pipe and run to the new pot fill location.
If installing pot filler isn’t something you don’t like to do, it’s best to hire a professional to install the new fixtures for you. Errors in this part of the process can lead to all kinds of unwanted things, such as damaging leaks, low water pressure, or other problems within the plumbing system.
How to Install A Pot Filler Line?
Before installing pot filler, you will need to run a water supply line in the area. To roughen the jar filler, you need to know exactly where you want it to go. Exact instructions for plumbing may vary by model, so double-check the owner’s manual before getting started.
As with any plumbing work, you will need to shut off the water supply to the area. Therefore, make sure to close the appropriate water shut-off valve before you start tinkering with the water supply line.
You need to have a short hose from the water supply. Typically, pot fillers require a threaded elbow to direct water out of the wall and into the pot filler unit. For this, you may need to attach a ½ inch nipple.
Be sure to review the pot filling instructions carefully, as instructions and specific specifications vary by model. Instructions should include the appropriate stub length, typically ½ inch beyond the wall or mounting surface. Once the rough piping is done, you can attach the pot filler.
As with plumbing, the mounting mechanism may vary by model. However, most pot fillers come with mounting plates to attach them to the wall. The plate is usually mounted on the pipe and then screwed to the wall.Some models come with two attachment points that attach to the mounting plate. Some pot fillers come with clips or washers for attaching the fixture to the water supply line. Follow the installation instructions to install these parts and screw the pot fill tap to the pipe. Tighten the screws attaching the faucet to the mounting plate as needed.
After completing the installation process, please double check your handwork. It’s better to find out it’s leaking now than later when you don’t expect it and have a mess on your hands. So turn the water supply back on and place a bucket or a pot under the pot filling.
Turn on the filling faucet to make sure the water flows smoothly without leaking. Let it run for a few minutes as this will help clear any debris or impurities from the lines. Turn it off and empty the bucket if necessary. If everything looks good, you’re good to go!
Frequently Asked Questions (FAQ)
How much does it cost to install pot filler
The cost of installing pot filler depends on several factors. For example, the size of the filling machine itself, installation, and the professionals you hire can affect costs. Depending on the complexity of the installation, it can be quite expensive.
Does the pot filler require two water lines?
Most canned fillers do not require two water lines. Canned fillers don’t have a stirrer, so they just dispense whatever they’re attached to. So you can connect either the hot water line or the cold water line to the pot fill. Pot fillers usually have cold water pipes, but hot water pipes are possible.
Where should the pan stuffing be?
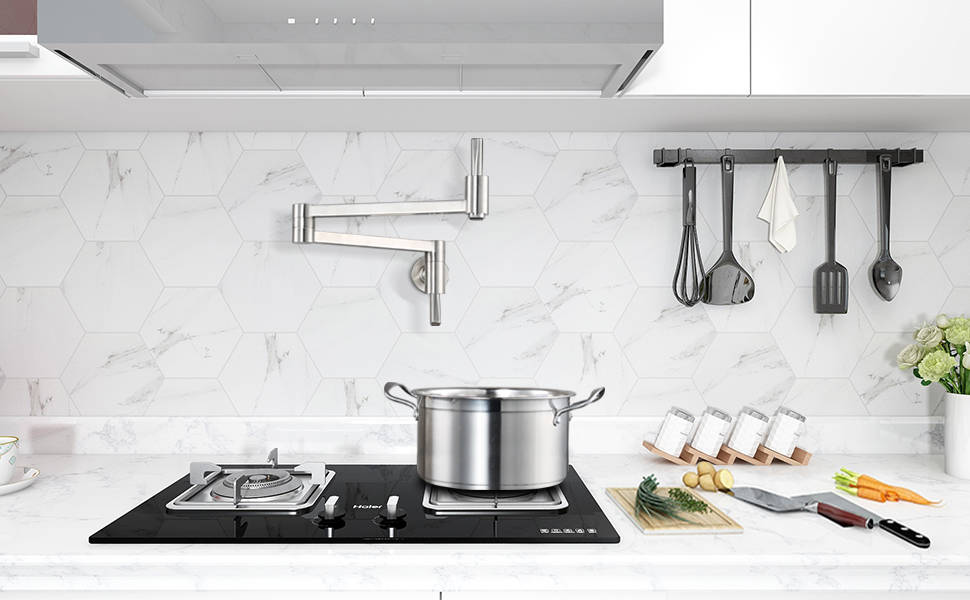
Typically, pot fillers should be on the left or right side of the cooking surface. This helps avoid reaching over the cooking surface to reach the faucet, which can be difficult while cooking.
How high should the pot filling be above the stovetop?
Pot filler is usually anywhere from 16 to 36 inches above the cooktop surface. The drastic range is mostly due to personal preference. You want to make sure you install the faucet high enough to fit the largest pot below it. Large plates may not fit under pot fillers that are too low in height, so choose the height that works best for you.
 WOWOW Faucets



您好!Please sign in