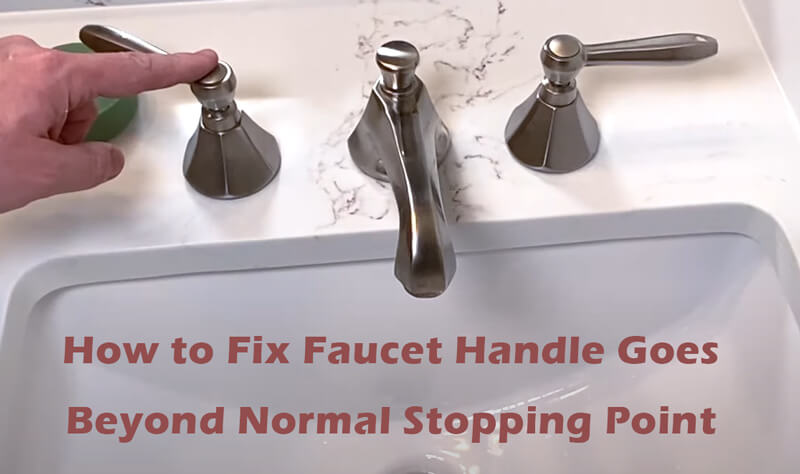
A dripping or misbehaving faucet can be a minor annoyance that can quickly escalate into a major problem if left unaddressed. One common plumbing issue that people often encounter is when the faucet handle goes beyond normal stopping point like moen faucets, delta faucets. This not only leads to water wastage but also causes difficulty in controlling the water flow. Fortunately, this is a problem that can often be fixed with a few simple steps. In this guide, we will walk you through the process of resolving this issue and restoring your faucet to its proper working condition.
How to Fix Faucet Handle Goes Beyond Normal Stopping Point
Step 1: Turn Off the Water Supply
Before you embark on any plumbing repair, it is essential to turn off the water supply to the affected faucet. This can typically be done by locating the shutoff valves located under the sink or at the main water supply for your home. Shutting off the water supply is crucial to prevent any unwanted water spills or accidents during the repair process.
Step 2: Remove the Faucet Handle
To access the inner components of the faucet, you need to remove the faucet handle. Most faucet handles are attached with a screw that holds them in place. You’ll need a screwdriver or an Allen wrench, depending on the type of screw used. Follow these steps to remove the faucet handle:
- Locate the Screw: Inspect the handle closely to find the screw. It is often concealed beneath a decorative cap or cover. Gently pry off or unscrew this cap to access the screw beneath.
- Unscrew the Handle: Using the appropriate tool, loosen and remove the screw holding the handle in place. Once the screw is removed, you should be able to lift the handle off the faucet.
Step 3: Inspect the Cartridge or Valve Stem
The most common reason for a faucet handle going beyond the normal stopping point is an issue with the cartridge or valve stem inside the faucet. The specific components may vary depending on the type and brand of your faucet, but the following are the general steps to diagnose and fix the issue:
A. Cartridge Faucets
- Inspect the Cartridge: Cartridge faucets typically have a cartridge assembly that controls water flow and temperature. Remove the cartridge by carefully pulling it out. Examine the cartridge for any visible damage, debris, or mineral buildup.
- Clean or Replace the Cartridge: If the cartridge is damaged or has mineral deposits, clean it thoroughly. Soak it in a vinegar solution if needed. If the cartridge is severely damaged, it’s best to replace it with a new one. Consult your faucet’s user manual or the manufacturer’s website for information on the compatible replacement cartridge.
- Reassemble the Faucet: After cleaning or replacing the cartridge, reassemble the faucet in the reverse order of disassembly. Make sure the cartridge is inserted correctly and secured in place.
- Turn the Water Supply Back On: Turn the water supply back on and test the faucet. Ensure that the handle no longer goes beyond the normal stopping point, and that the water flow and temperature are easily controllable.
B. Compression and Ball Faucets
- Inspect the Valve Stem: For compression and ball faucets, the issue often lies with the valve stem. Inspect the valve stem for any visible damage, corrosion, or debris. Wipe it clean and remove any mineral buildup.
- Replace O-Rings or Washers: Compression faucets use rubber washers or O-rings to create a seal. If these components are damaged or worn, they can cause the handle to go beyond the stopping point. Replace the damaged O-rings or washers with new ones.
- Reassemble the Faucet: Reassemble the faucet, ensuring that the valve stem is properly in place. Make sure the parts are tightened securely.
- Turn the Water Supply Back On: Turn the water supply back on and test the faucet. Verify that the handle now functions as it should, and that there are no leaks.
Step 4: Test the Faucet
After you’ve completed the necessary repairs and reassembled the faucet, it’s important to test it to ensure that the issue has been resolved. Here’s how to do it:
- Turn On the Water: Gradually turn the water supply back on to the faucet.
- Check for Leaks: Inspect the area around the faucet and the connections for any leaks. If you see any leaks, turn the water supply off immediately and recheck your work.
- Operate the Faucet: Turn the faucet handle and observe the water flow. Ensure that the handle now stops at the desired positions, and you can easily control both the flow and temperature of the water.
- Make Fine Adjustments: If you notice any minor issues or if the handle is still not operating perfectly, make fine adjustments as necessary.
Step 5: Reassemble the Faucet Handle
With the faucet working properly, it’s time to reattach the handle. Follow these steps to complete the repair:
- Position the Handle: Align the handle with the valve stem or cartridge, making sure it fits snugly.
- Insert the Screw: Reinsert the screw into the handle and tighten it securely. Replace any decorative caps or covers if applicable.
Step 6: Turn On the Water Supply
Now that the handle is securely in place and the faucet is fixed, turn the water supply back on. Double-check for any leaks and ensure that the handle operates smoothly without going beyond the normal stopping point.
In most cases, following these steps should resolve the issue of a faucet handle going beyond its normal stopping point. However, if you encounter more complex problems or if the faucet is still malfunctioning, it’s advisable to consult a professional plumber for further assistance.
Preventative Maintenance
To prevent future issues with your faucet, consider the following maintenance tips:
- Regular Cleaning: Clean the faucet, handle, and aerator regularly to prevent mineral buildup and corrosion.
- Check for Leaks: Periodically check for leaks or dripping faucets and address them promptly.
- Replace Parts: If you notice signs of wear or damage to the cartridge, valve stem, or other components, replace them as needed.
- Install Water Softeners: If you have hard water, consider installing a water softener to reduce mineral deposits that can affect your faucets.
Conclusion
By following these steps and practicing preventative maintenance, you can keep your faucets in excellent working condition and avoid the frustration of a faucet handle that goes beyond its normal stopping point. With a properly functioning faucet, you’ll save water and maintain the convenience of easily controlling your water flow and temperature.
 WOWOW Faucets


您好!Please sign in